Interested in making your own Star Wars edit? I’m not an expert but here are the programs and processes I use.
Hello, Future Me
I’m making these detailed process notes first and foremost for myself. If I don’t, I can guarantee I’ll have to replicate them at some point in the future, and I’ll have totally forgotten everything by then.
I should stress that I’m a graphic designer and web developer by trade, so while I know some basics of video editing I’m not a professional. Some of these programs and processes are probably dumb and bad. They’re just the tools I have available. If you have any suggestions, feel free to sound off in the comments!
Prep work
First, and I cannot emphasize this enough, you should own a legal version of whatever film you’re editing. Period. If you like the film enough to sink hours into editing it, do the right thing and vote for its existence with your dollars. It’s also the best way to ensure you’re working from the highest-quality source possible.
You should also figure out up front what program(s) you’re going to use for the actual editing, as that will determine a lot of the file formats and settings you’ll need to apply as you gather footage. I’m deep into the Adobe ecosystem so I use Premiere for editing, After Effects for detail work, and other third-party programs for ripping and converting.
The Blu-rays
Most of what I know about ripping your Blu-rays to your hard drive comes from this Lifehacker article, and I’d encourage you to read it.
Step 1: Rip with MakeMKV
Use MakeMKV to import videos from your legally owned Blu-ray as MKV video files.
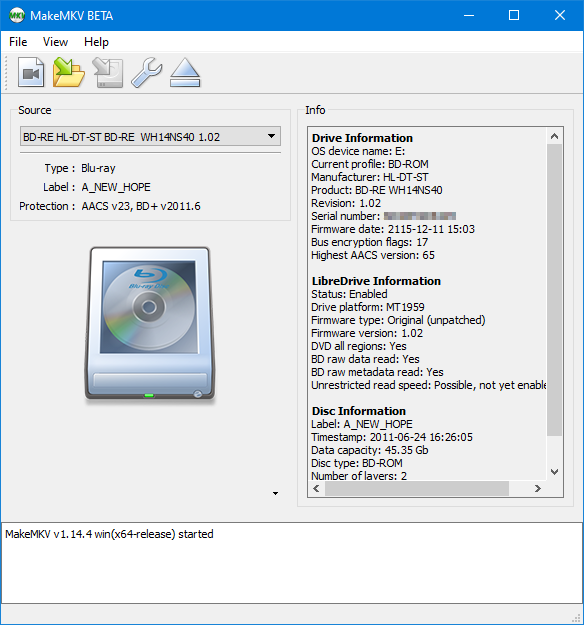
Click the big Open Blu-ray Disc icon to get started.
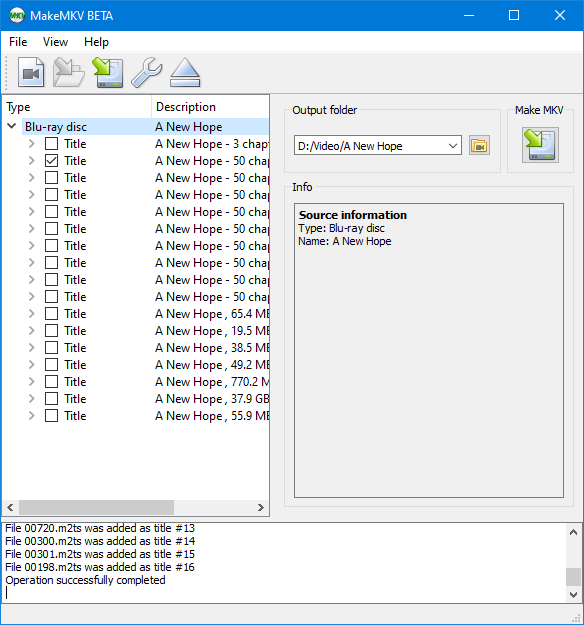
You can find the file with with longest run time (the movie) and just rip that, or grab every file and sort them later. Make sure to uncheck unneeded foreign languages, foreign subtitles, etc. Then click the Make MKV button and go get a sandwich while it runs.
Step 2: Convert to MP4 with Handbrake
Unfortunately, Adobe Premiere doesn’t seem to like MKV files, so my next step is converting to the more compatible MP4 format with Handbrake. Select the MKV file as the source and get started tweaking settings:
Picture
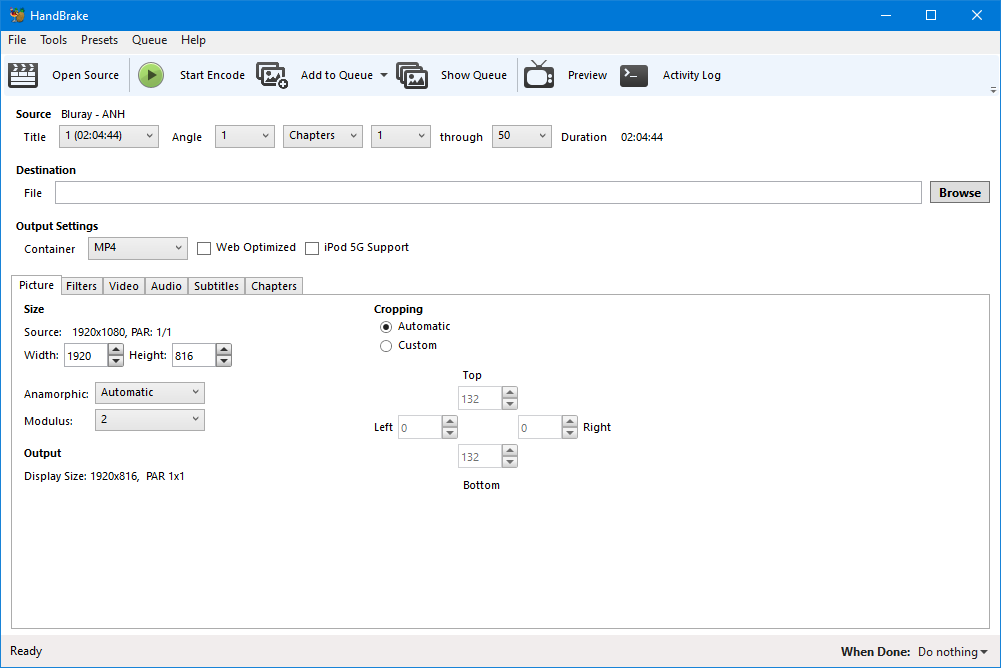
If as in this case the MKV rendered with extra black bars at the top and bottom, Handbrake should detect that and suggest automatic cropping to eliminate these. This is generally good, since it will reduce the file size of the resulting MP4, but you may need to play with the cropping to make sure it’s not being overzealous.
Video
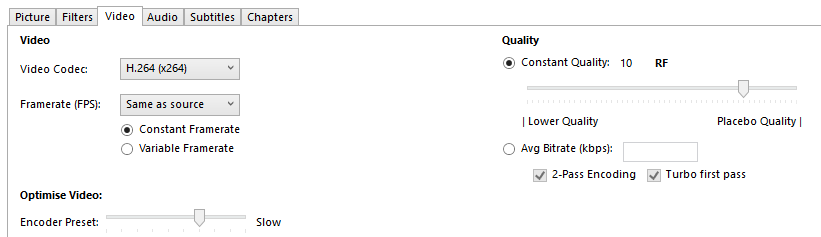
Set Framerate to “Same as source” and “Constant Framerate.”
Set Quality to around 10 RF. This is probably overkill and will result in a larger file, but since we’re daisy-chaining our video file through a lot of formats, we want to preserve as much quality as possible.
Set Encoder Preset to “Slow” or slower. This will take a bit longer but should yield slightly smaller and/or better quality files.
Audio

Add all desired audio tracks. I just want the highest-quality English audio, so I use the first one (DTS-HD MA, 6.1 ch).
If you want to grab multiple audio tracks, be aware that Premiere will only read the first audio track of an MP4 file with multiple audio tracks. You’d need to convert each to a separate file, then import all to Premiere and assemble there.
In general, you’ll get the best audio quality by using the same codec as the audio track and selecting the Passthru option. However, Premiere will not read some of these codecs, such as DTS-HD. So set any of those tracks to these settings:
- Codec: AC3
- Bitrate: 640
- Mixdown: 5.1 Channels
You can also name each track by clicking on the little down arrow, but since Premiere won’t read these names anyway it’s not necessary.
Subtitles
I haven’t figured out subtitles yet, since they’re not the focus of this project. I just hit the Clear button to get rid of any existing tracks and leave it at that.
Final steps

Set a destination and name for the converted file.
I recommend using the Chapters dropdown to select a random chapter from the middle of the film for a test encode. You’ll want to make sure all your setting are correct before converting the entire movie.
Once you’re ready, hit the Start Encode button and take a nap.
The resulting MP4 should be at most half the size of the MKV, so you may want to delete the MKV to free up hard drive space. Just make sure you’re really done with it or you’ll have to repeat the above!
The Despecialized Edition
You can find more information on the Despecialized Edition, and how to download it, at these links:
convert to MP4 with Handbrake
Laserdisc
Rip with Handbrake
Import into Premiere
Set up timelines
Sync audio
Master SOURCES sequence
Divide into 5-minute chunks
Create chapters, copy-paste chunks into each
Replace with after effects comp
Leave a comment